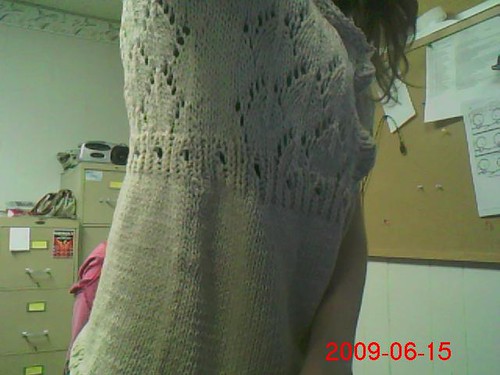
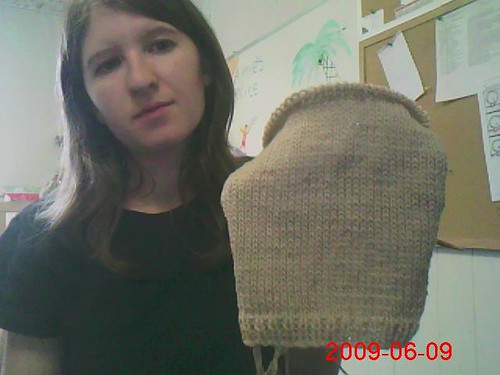
I started a Lelah (no link, because it's a pain in the butt to find the pattern now, I'm mostly going off memory) to alternate with Luke's hat. Turns out Patons Kroy isn't much fun to work with. It's a little scratchy. I've barely gotten past on the ribbing on the hat and I needed a break already.
I can't remember exactly which yarn I'm using for Lelah. It's a bamboo/acrylic blend from Hobby Lobby. It's mostly acrylic, if I remember right, bu I decided this wasn't the sort of project that would need a hard block. And I love the silky, slinky drape of it. It's very nice. And blocking will help even out the work, it just won't open up the lace any more. Which is fine. I kinda like it the way it is.
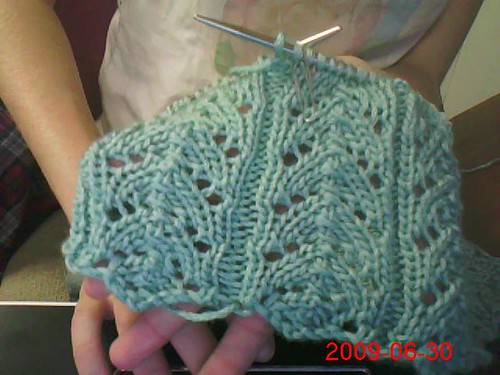
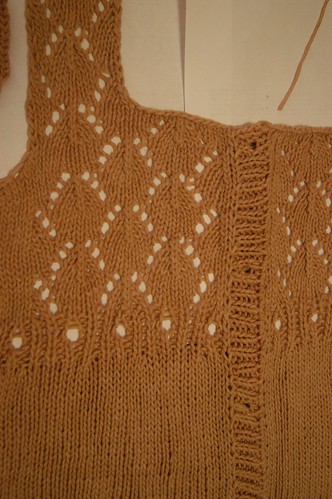
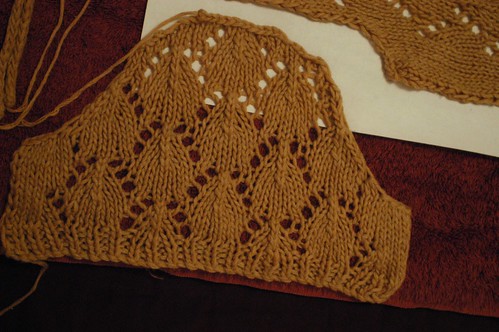
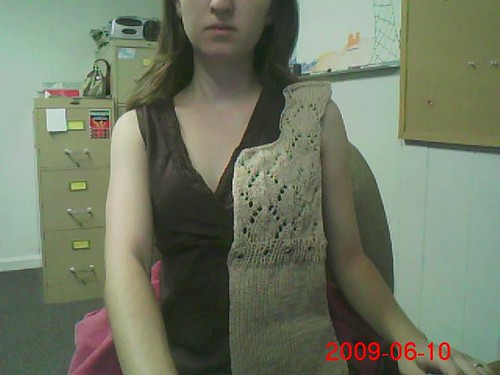
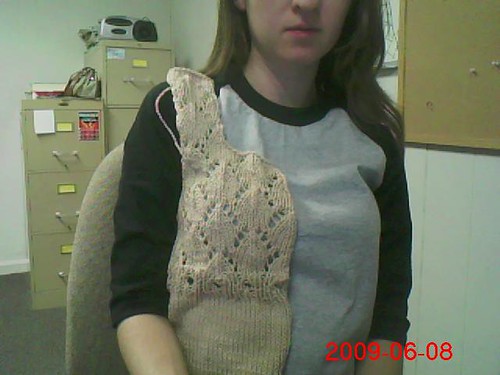
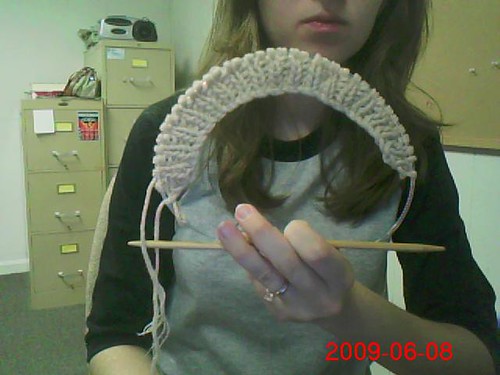
Here's progress so far:
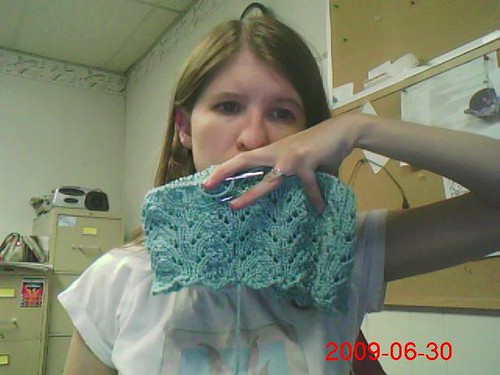
Color is fairly accurate, maybe skewed just slightly to the blue side. It's a pale turquoise-y color. I like it a lot.
I'm working on the 6th repeat of the fishtail lace. The pattern calls for 7-8, but I'm using smaller yarn (light DK) so I think it's going to be more like 12 or 13 repeats for me. That's fine, as long as I don't run out of yarn. I only bought 2 balls. I've still got quite a bit of the first ball left, though, and haven't broken into the second yet, so I think I'll be okay.
I'm using my Addi Turbos (size 10, or maybe 10.5, I don't remember for sure) for the lace pattern, but I'll have to go way down for the top stockinette portion. I'll probably use 4s or 5s for that. Maybe even 3s. I want it to be as solid as possible.
I also plan to put straps, but I can't decide whether I want to do regular tank-top style straps with a square neckline, gathered straps to create a slightly more interesting neckline shape or simple i-cords. I guess I'll decide when I get there. It may depend partly on the amount of yarn left.
I'm thinking either matching i-cord or white ribbon for the tie.
Maybe I'll eventually find and post the link here. In the meantime, you can find Lelah on Ravelry. (Yes, I know, I could link that, but then I'd have to go find it, and well...yeah.) There's nice fo on there with tank-style straps, though.
ETA: Okay I grabbed the second ball of yarn when I went home for lunch. It's Naturally Caron Spa, 75% "microdenier" acrylic and 25% rayon from bamboo, in the Ocean Spray colorway. The color on that site is pretty accurate on my monitor.
And, okay, fine. Lelah. Or, on Ravelry, I like this one.
Tuesday, June 30, 2009
Saturday, June 27, 2009
Productive day
I found a new yarn store yesterday. We went to The Village Knitter in Newburgh, IN. I love it! They had a pretty good selection of yarn. There were a few notable things they didn't have, like Lamb's Pride, but I can't think of anything notable they don't have that I like, anyway. Nice selection of the stuff I do like, and it's organized by yarn weight, which is kinda nice. Prices are comparable to any other yarn store I've ever been in. And most importantly, the women there were unbelievably nice. I was wearing my Anne Elliot, and they all oohed and ahhed over it. :) I was around the corner from where they were sitting, and I heard one of them make a comment about how the shirt I was wearing was really cute. They discussed it for a minute, debating whether it was handknit or not, and then when I stepped back out into the open they called me over and praised it. It made me happy.
I didn't buy any yarn, but I did pick up some Crystal Palace needles. Size 5, 16" circs. Yay for new hat needles! My old ones had disappeared.
Plus, the store itself is really kinda cool. It's in downtown Newburgh, a block from the Ohio River, in the middle of the antique district. The buildings are all old and cool-looking, and it's a nice little downtown area to walk through. Reminds me a little bit of a much less busy, much smaller Gatlinburg or maybe Pigeon Forge ... lots of little stores to visit, and it's the perfect area to walk through, instead of driving.
I still like Enchanted Yarn and Fiber, too. We just don't get down to Russellville very often. We're in Owensboro all the time, and Newburgh isn't that much farther. We also visit Evansville fairly regularly, and Newburgh is on the way (assuming we take that route). And I like Special Things, too, but it's nice to have a couple of different options.
Pretty happy with my discovery. Luke liked the area too. He didn't care that much about the yarn store itself, not being a knitter, but he liked the area.
In non-knitting news ... Luke and I also stopped by the drive-in on our way home yesterday. That was fun. $8 per person for two new movies, not terrible quality, and it was a nice experience. Plus, I could knit while watching the movie and not offend or annoy anybody, since we were alone in our car.
It was a good day.
Oh, almost forgot to mention, the ladies at The Village Knitter definitely know what they're doing. They had several very nice samples there, including what appeared to be a mohair-blend (I'm thinking maybe Kidsilk Haze) Estonian Lace Garden. That was exciting. I still like mine better, of course. But it made me happy to see the shawl, point it out to Luke and have him recognize it as something similar to my shawl. And it was very well-done. The slightly fuzzy yarn did well with that pattern. Good to know...all the other samples I'd seen were done with smooth yarns with little to no halo.
Wednesday, June 24, 2009
hey jess...
I'm not sure if you've seen these or not, but the first reminds me of you and the second reminds me of Justin (obviously). Thought you might be interested.
Sparkle Flake dishcloth
Hero dishcloth
Sparkle Flake dishcloth
Hero dishcloth
Tuesday, June 23, 2009
another Jessica FO parade
Because I haven't posted since April but I have been knitting I have several projects to share. This is going to be a bit longer of a post. But hopefully I'll get back into the habit of posting fo's as a finish them instead of months later. We can hope anyways right.
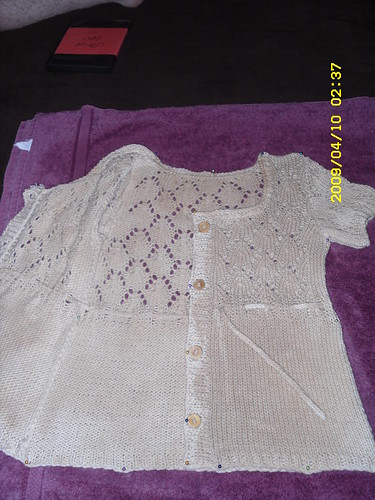
First a test/sample knit for Lorna's Laces. This one was knit towards the end of last year. And apparently I wasn't bothered enough to list the actual start and stop times.
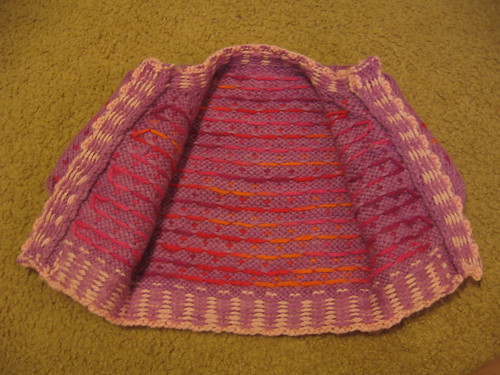
Pattern:Candy Dots Cardigan by Jackie Young
Yarn: Lorna's Laces Green Line Worsted in Mirth, Whisper, and Bittersweet
Needles: US 6 and 8 (4.0mm and 5.0mm)
Notes: a cute childs cardigan. I knit it late in the year, early in my pregnancy. I was exhausted most of the time so the actual knitting tool longer than it should have for me. Its knit flat and sewn together. not my favorite construction but its a nice shape. I knit the 6 month size. The yarn was a pure dream to work with. I'd use it again in a heartbeat. Lovely drape. Awesome color availability. Really a very nice yarn to work with. since it was a sample/test knit I no longer have the sweater and can't attest for the longevity of the yarn.
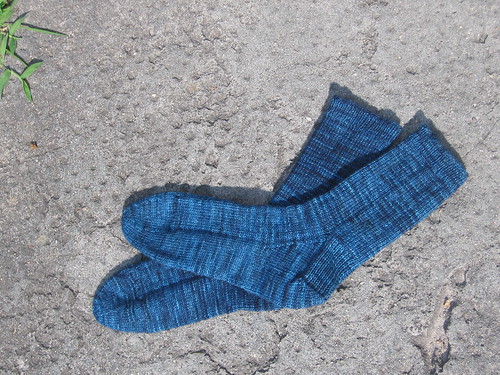
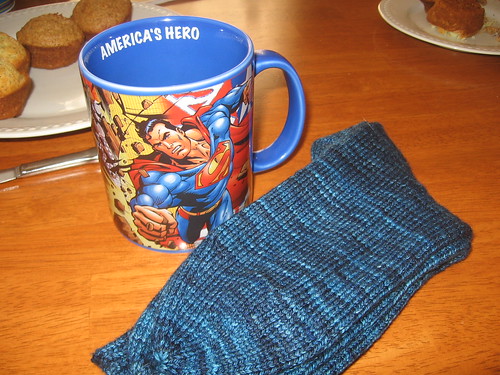
Next up we have Justin's 7th pair of socks. Another basic k3p1 rib sock with a slip stitch heel flap and gusset, round toe. These are knit from Smooshy in Black Parade. Which is a black yarn with just enough blue in it to not drive me completely crazy. I wasn't as impressed with the smooshy this go. I knit with it before and loved it. This time it just didn't seem as nice. The finished product is great. But it was a little stringier to knit with. perhaps I got an off skein. Justin loves them and wears them to often (meaning they are making regular appearances in his work boots and showing some felting on the heel as a result).
Pattern: Justin's basic sock recipe
Yarn: Dream in Color Smooshy in Black Parade
Needles: us 0 (2.0mm)
Start:April 7th
Finish:May 20th
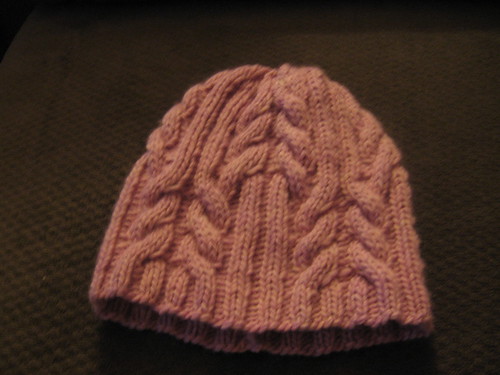
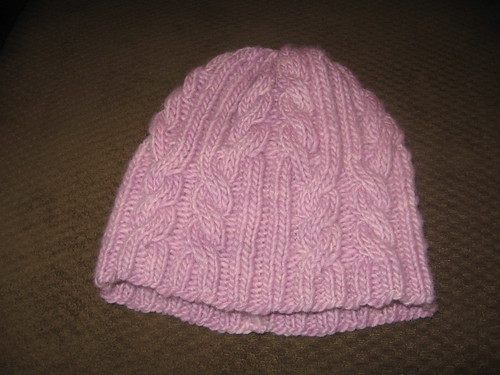
I decided that I needed a fast project just for me. So I knit up a malabrigo hat. Last year when I made justin 2 hats, his dad a hat and his cousin a hat all from malabrigo, i'd also purchased some for me. But had neglected to knit it yet. Easy fast hat pattern.
First pictures shows the detail on the hat a little better and second picture is a little more color accurate.
Pattern: Utopia Hat by SmarieK
yarn: Malabrigo worsted
needles: 4.0mm (us 6)
Started: June 7
finished: June 7
I decided to surprise Justin for Fathers day with his 8th pair of socks. Again his basic k3p1 recipe. But I got an awesome yarn. JulieSpins MCN 355 (80% merino 10% cashmere 10% nylon) in Bright Space. This is by far one of the nicest yarns I've ever worked with. It is a bit thicker than some other fingering weight yarns. When Justin pickd up the socks the thickness was the first thing he noted.
Pattern: Justin's basic sock recipe
Yarn: MCN 355 (Rav link)
Needles: 2.25mm (us 1)
Started: June 8
finished: June 20 (just in time)
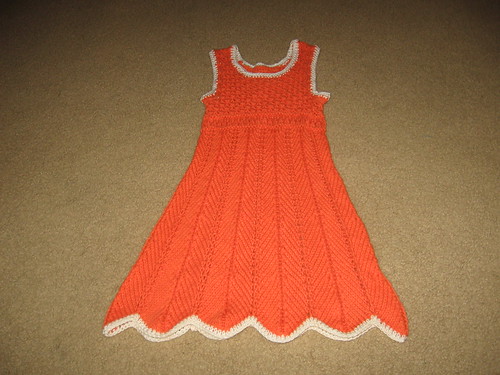
And since the father's day socks were a surprise project I had to find something to knit on while Justin was home (which was more often than I realized). So I knit Natalie an Elenka. Which went extremely fast. I have been promised a picture of Natalie wearing the dress. So hopefully will be able to share that with you. She tried it on for me and I was very happy with its fit.
Pattern: Elenka
Yarn: cotton-ease in orangeaid
Needles: us 7 (4.5mm)
started: June 11
finished: June 17
See told you I've been knitting. I actually even have 3 more projects finished and 1 in the works. But I'll save those for another post. This one is long enough already. Oh also all projects are documented in Ravelry, so if you by chance want more info on anything you can check it out there or feel free to leave a comment.
I'm still here!
Not much knitting going on around our house lately. Why, you ask? Well, two reasons. One, I've been trying to get the place cleaned up (a necessary evil). Two, I took my knitting bag on a weekend trip with me and now I can't find it. I'm almost 100% positive it made it back into the car when we left, but I don't remember seeing it after that point and I can't find it anywhere in the house. :(
I'm not too concerned about the knitting itself, because I hadn't gotten that far and it's an easy project. I haven't posted about it yet here, but as you see on the sidebar, I have started a new project: a gamer hat for Luke. It's just a plain gray hat, except it has Nintendo-related symbols around the edge. Specifically a triforce (from Legend of Zelda), a screw attack (Metroid), an energy tank (Megaman) and a P-wing (Mario). I'll post my charts here if they turn out well in the knitted product. But it may be a while before that happens, because first I have to find my knitting bag (with all the yarn and needles, which I am worried about) and then finish the knitting. I'm duplicate-stitching the designs on after the main hat is finished. I originally planned to knit them in, but it's more trouble than it's worth. Duplicate stitch will work just fine.
The basics: Patons Kroy sock yarn in a dark gray color, size 3 dpns and embroidery floss for the symbols because it's cheap and comes in a lot of bright colors and is about the right size if I use all 6 strands together. I couldn't think of anything better to use. No other yarn I saw had all the right colors, and you can't beat the price for embroidery floss, especially when you have to buy several different colors.
So, I'll post images and a chart whenever I can.
Meanwhile, Hey, Teach finished blocking and I wore it. I love it and got several compliments on it. The button band still gaps; I think it's just too floppy. I'll probably eventually crochet a narrow edge on it to help it keep its shape. The sweater also wrinkles like you wouldn't believe. I'm really happy with the finished product, though, and I'll post good-quality pictures of it begin worn as soon as the weather (and Luke) cooperate.
Friday, June 19, 2009
Block it ... block it good! (AKA Day 20)
I dug up some motivation, and some pins, and began the blocking process on Hey, Teach. I didn't do a full wet block this time, just spritzed with warm water mixed with a little tea tree oil. (I already had the oil in the bottle, and I figured its antibacterial properties wouldn't hurt anything. I just hope the oil doesn't do anything weird like discolor the yarn. Surely it won't; there are wool washes with tea tree oil in them.)
I used quite a few pins, though, to make sure everything was as even as possible, and I think it worked out to my benefit. The ribbing is all laying flat, and I stretched it wider to take out the flare. It worked. As long as it holds its shape when dry, things will be good, and I won't even need to crochet a border anywhere. Here's hoping.
And here's a few pictures of the blocking process:
The color is off, obviously, but it actually doesn't look too bad on the actual sweater. It's a little washed out but not horribly different. The towel it's laying on is actually burgundy, not purple, though.
The more I work on Hey, Teach, the more I like it. I'm hoping it'll dry quickly, especially since I just spritzed instead of soaking it in water, so I can wear it.
Luke is impressed by the whole thing, but especially by the i-cord, hehe. He looked at it earlier and asked me if I made "this rope thing" too. Then I had to explain how I made it. He picked it up and fondled it awhile, admiring it.
I'm glad somebody likes my i-cord, at least, because I'm not a fan. It looks fine, but not good enough to get me past the tedium of knitting it, hehe.
And, as an added bonus, I was finally able to get some pictures of Hew since I had the camera out anyway. Unfortunately, none of them turned out well. This is the best we got:
I'm planning on crocheting a row or two around the edges of the sleeves to tighten them up. Ribbing would work better, I think, but I'm pretty sure I don't have enough yarn left for enough ribbing to do the trick. But I don't like the sleeves being all loose like that. Oh, and they look lumpy in the picture, but I promise my arm isn't lumpy. I had the white shirt's sleeves wadded up inside Hew's sleeves. Definitely gonna have to hem the sleeves on the white shirt.
I was gonna get pictures of the Baroness Beret tonight, too, but it's gone missing. I'm sure it'll turn up, and I'll get pictures when it does.
Here's a link to the original post about Hew, but for your convenience, I used almost 4 full balls of Elsebeth Lavold's Classic AL in color 05 (Aged Wine) with size 4 needles.
All in all, I'm satisfied with Hew, but not thrilled with it. (Anne Elliot Spencer is much better.) But I LOVE Hey, Teach.
Wednesday, June 17, 2009
Finishing up
Well, what more can I say? Day 19, and ... It's finished.
I have yet to block it; I admit that I'm kinda putting that off because it takes so long to dry. (Especially since the air around here has been really damp lately.) And I think I may need to pin the ribbed edges, which means I have to find pins.
My goal is to be completely finished in 3 weeks (21 days of actually working on it). I think that should be pretty easy. 1 day to block, drying time doesn't count because I won't be actively doing anything to it, and then 1 day for crocheting along the edges (if necessary) once it's dry.
But aside from that ... voila!
If you look closely at the picture of the back, you can kinda tell where I had to be creative to get the eyelets threaded correctly, right in the center. It wasn't a mistake, exactly; I did the math and couldn't get things to work out how I wanted, so I opted for the least annoying solution. There's actually an extra eyelet there in the center, and the i-cord is just threaded through the stitches on either side of it. I guess it would've looked better to leave that eyelet out entirely, but it would've made it more difficult to find the right stitch and I didn't think of the obvious solution (a stitch marker) at the time. It doesn't look bad, anyway. I doubt anybody'll notice if I don't point it out to them.
I'm so pleased with this sweater. The ribbed bind-off edges (on the buttonbands and the neckline) are still flaring quite a bit, and I'm thinking that if blocking doesn't do the trick, I'll crochet a tight border on to pull it in and keep things in check. I don't know yet though. I'm really not terribly fond of the neckline ribbing anyway, so I may just cut it off and replace it with a crochet border. That would be narrower and I think it would look better. But we'll see.
Overall, I'd call it a successful project. Now I just have to work up the motivation for the final blocking so I can wear it.
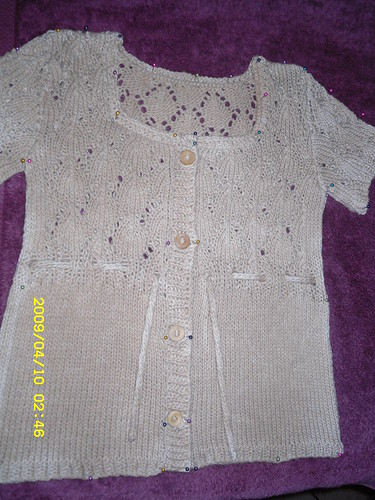
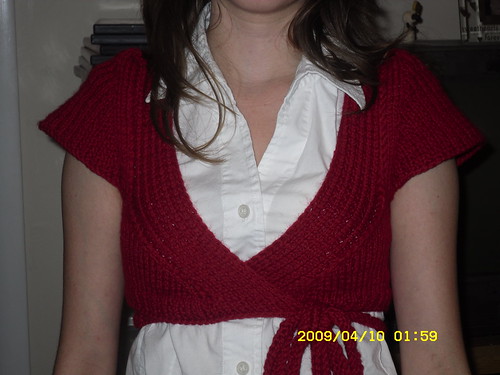
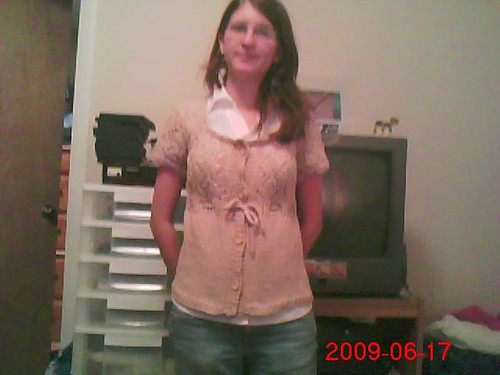
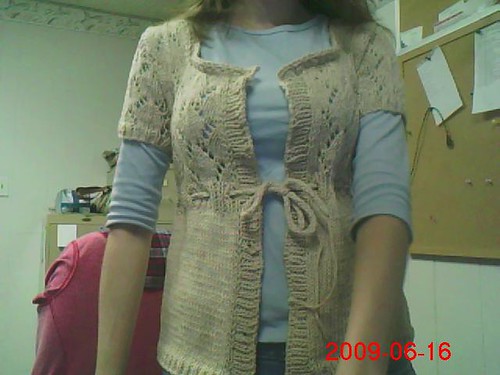
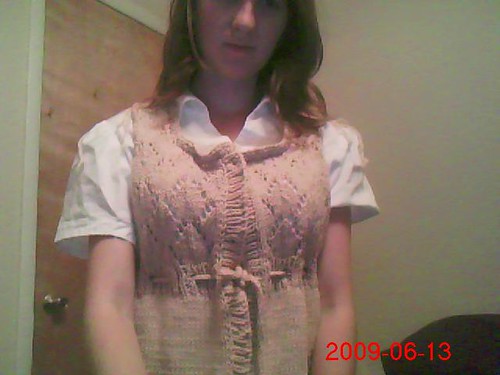
For reference purposes ... another link to the pattern so you can compare mine to the original. Yes I used the entire outfit for inspiration. (I just didn't feel like changing into khakis for webcam pictures.)
It tooks cute over other shirts too, but I really love it over that white button-up. I had to tuck the white shirt's sleeves up about a half inch, since they're slightly longer than the Hey, Teach sleeves, but I think I'll end up hemming them anyway.
And I still have to take better pictures, with a real camera, once the final blocking is complete. In the meantime, you'll just have to deal with these, though. It was late last night when I finished it and Luke and I both worked today.
Oh, and you can blame Luke for the suckiness of these pictures. He was the one pushing the button, since I had to stand too far away to get the whole sweater in the shot.
-Amie
Tuesday, June 16, 2009
the end is near! (or, day 18 of the hey, teach project)
Hey, Teach is so close to being finished that we can just call it an FO, right? Right? Okay, well, no, not quite, but very very soon. I finished the second side seam last night. All the ends are woven in. (Except for the two on the i-cord, because I forgot about them, but I'll take care of those as soon as I post this.) The buttons have been purchased, and the needle is threaded to sew them on as soon as I find the bag they're in. Then I'll wash it and pin it to my block board and leave it to dry. (I thought about blocking it last night and sewing the buttons on later, but it was late and I was tired and didn't feel like spending forever hunting down pins and then arranging this sweater juuuuuuuuuuuuuust right to pin it down. You understand.)
Also, I don't think I'll need to redo the bind-off on the neckline. It still flares a little, but it looks much better when it's being worn. I think blocking will take care of it. I may be wrong, but I think it'll be okay.
So anyway...wanna see?
It gaps a little right now, but that's just because I used paperclips to hold it closed for the picture. This is what it looks like without the clips:
And yeah, I know, I'm wearing a shirt with longer sleeves than the sweater, but it was clean and comfy and I really like this shirt. Deal with it. ;)
So for the important part: Hey, Teach fits like a dream. And I am VERY happy with it. That makes 3 wearable projects that I am entirely happy with! (Anne Elliot Spencer, Baroness Beret and now Hey, Teach.)
Yay!
Monday, June 15, 2009
Hey Teach, Day 17
I got the second sleeve sewn in, and I managed to get one side seam sewn. I even wove in all the ends! All that's left now is to sew the other side seam, weave in those two yarn ends, sew on the buttons, thread the drawstring through the eyelets and do one final wash/block. I should be able to get that all done tonight, I think, if my meeting doesn't last too terribly long. Then I'll just be waiting for it to dry so I can wear it. Maybe if I leave the blocking board in my car, it'll dry faster. Hmm...
Sleeves:
Seam:
It looks a little loose because the other side is just hanging there, completely open, and because I'm wearing a thin tee shirt underneath. I think it'll fit pretty well with a nice button-up shirt.
It's good to know that at least one thing is working out the way I want it to right now.
Sunday, June 14, 2009
almost finished
Day 15 of Hey, Teach: I didn't get as much done as I'd hoped because I ended up sick and took a 5-hour nap (!) in the evening. I did manage to get the shoulder seams sewn and the neckline ribbing finished. I may have to pick out the bind off and redo it; I used a loose bind off and it flares a little. I'll just have to wait and see how it looks after blocking. It may be okay.
Ignore the too-large sleeves that I have yet to alter on that shirt. I haven't figured out yet exactly how to go about minimizing the sleeves and nothing else. Also, pretend that Hey Teach has sleeves and the sides are sewn together and there's buttons sewn on.
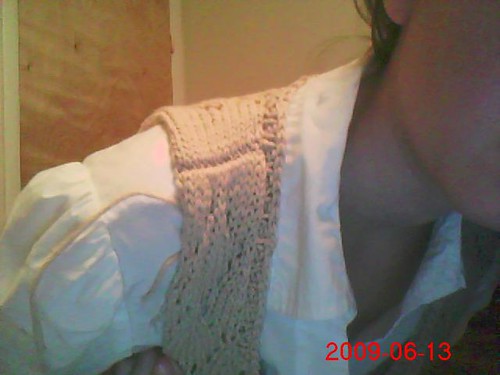
And a close-up of the neckline ribbing and the shoulder seam:
That ribbing is a little bigger than I expected, but oh well. I don't mind it enough to rip it out and bind off a row sooner. Although I might do that if I have to redo the bind-off anyway ... maybe. We'll see.
And, because I'm tired and I'm fairly certain I won't be doing anything else tonight, I'll go ahead and post progress for today, Day 16. No picture because I don't have the sweater handy and don't feel like getting up to get it, but all I accomplished today was the sewing-in of one sleeve. It took a little longer than I'd expected because I had to ease it in very carefully and I had trouble finding a sewing method I liked. I finally dug up a size E crochet hook and slip-stitched it in. I'm satisfied with how that turned out.
I'm hoping to get the other sleeve sewn in tomorrow, and maybe the side seams as well if I can find my tapestry needle. And I bought buttons the other day, so I need to sew those on. Then weaving in all the ends (except the neckline ribbing, in case I have to redo the bind-off) and the final wash and block. I'll get there, soon. It would be even sooner if I didn't feel like crap.
Oh, and for the record, I still have one full ball of yarn and most of another left over, with nothing left but sewing that one sleeve, the side seams and the buttons.
Thursday, June 11, 2009
Two weeks!
Well, I passed the Day 14 benchmark, and while I didn't manage to get the sweater completely finished in two weeks ... I did get it all the way to the first blocking stage. Yesterday I finished the buttonbands, which marked the last of the big pieces of knitting. Last night I blocked. Nothing major, since this blocking was only for sewing purposes and I'll do a real wash and block after the whole thing is complete to help settle the seams. I just soaked all the pieces in a sink of warm water and fabric softener and patted them out in the correct size and shape on some towels. No pinning or anything. The pieces stretched a LOT when they were wet, especially the back pieces, but I think I managed to get it back to the proper size when I smoothed it out on the towels. I hope. If not, I'll try to take care of it when I do the final block.
And let me tell you ... this yarn? So impressed with it. It blocked like a dream. I mean, seriously, all I did was get it wet and softened and laid it out flat. And it looks great. The stitch definition is perfect, everything looks nice and even, the lace is nicely-defined, and all without the use of pins or anything. I can definitely recommend it.
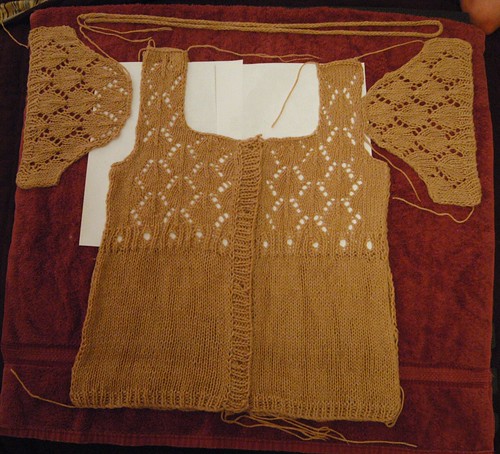
Without further ado ... more pictures (from a real camera!) than you really need of the blocking-in-process:
All the pieces laid out to block:
Close-up of the front, showing the lace:
I thought this was kind of a cool picture, and it shows the stitch definition well:
And, one sleeve:
I was good. I kept it to 4 pictures. (I have several more ...)
I know the buttonbands still look weird. I didn't mess much with them. I'll take care of those with the final wash and block. This time I was mainly concerned with the arms and shoulders. And yeah, these were taken inside at night so the color's a little bit off and I can't correct it very well without Photoshop. But it shows the stitch definition and all that. :)
And just because I can, here's a gratuitous picture of my cat.
Crappy picture, but I was trying to get ready for work and Luke was still asleep, so the lights were all off except that one lamp. I thought she looked cute there on my pillow.
I wanted to make sure the fronts matched up to the back, so I layered them. It'll take longer to dry, but everything will be the same size, and that's worth it.
I slipped some white paper between the layers to help keep the moisture where it belongs (and help it evaporate) and to help show off the lace in the pictures.
The pieces are on my blocking board in the living room floor now, still drying. That's the worst thing about cotton, it takes forever to dry naturally. Maybe I'll take a hair dryer to it at lunch or when I get home tonight. I'm anxious to get back to work!
Next step? Shoulder seams and neckline ribbing. Once that's done, all of the actual knitting will be done and there will be nothing left except for sewing the sleeve and side seams, sewing on buttons, weaving in ends and that final wash 'n' block. All of which I could theoretically finish today, if the pieces would dry and if I had buttons.
DRY! DRY! DRY!
Wednesday, June 10, 2009
Woohoo!
As expected, I completed the right front of Hey, Teach last night. I didn't get a chance to work the buttonbands, but I'm about to start on those.
I did realize that I made one minor mistake. I was supposed to put the neckline stitches on a holder, and instead, I bound them off. No big deal, though. I'll either pick up stitches for the neckline (and do the same on the back so it'll be consistent) or I'll snip a stitch and undo the bindoff. Either way, it'll be pretty simple. I'm not worried about that.
I'm thinking that binding off would look better, because I have to pick up stitches along the vertical edges anyway and it would be more consistent. BUT I think using live stitches would be more comfortable: no potentially uncomfortable seam across my chest/back.
Any suggestions or opinions? They are, as always, very welcome.
And now, for today's photo. This is, what, Day 13? Doesn't look like I'll make it in 2 weeks. But it won't be much longer than that. I can deal with that.
I really hope I can finish the buttonbands today so I can block these tonight. I'm ridiculously excited to see how it looks all blocked and sewn together. I just hope that blocking it so it looks really good doesn't make it too big. It shouldn't, but I'm a worrier.
By the way, I know the pattern says to block, sew the shoulder seams, do the neckline ribbing and THEN do the button bands. I'm choosing not to do all that. I think it'll look better if the neckline ribbing goes across the top of the button bands, as well as the rest of the sweater, which means the button bands have to be completed before the neckline ribbing. And the only reason for the blocking and sewing is that those are prerequisites for the neckline ribbing, so those can also wait.
I do have to go find and buy buttons at some point soon though. I haven't picked those up yet, and I'll need them once I start putting this together. I'll probably end up with something pretty similar to those shown in the model photo on the pattern. I like the wood, and I've seen some very similar ones at Wal-Mart. Which is good, because Wal-Mart is pretty much the only option I have. Well, or Hancock Fabric, if I wanna wait till the weekend. I don't want to wait.
Tuesday, June 9, 2009
Closing in
I'm closing in on the final stages of Hey, Teach. Last night I finished the stockinette portion of the second front half. Nothing left now but the center ribbing, lace, button bands, blocking, sewing together, neckline ribbing, weaving in ends and final wash/block. It sounds like a lot when I list it, but that's all small stuff.
And I expect to finish this half today. In fact, I'm so sure of it, I'm going to go ahead and change the progress bar on the left sidebar to reflect its completion.
Here's where it was as of last night:
Expect to see a photo of it completed tomorrow. And maybe, depending on how well today goes, the button bands too.
I need to find my camera so I can get good pictures of the finished object! And I need to find it soon, because I have a feeling this project will be completed very soon. Yay!
I also bought fabric yesterday to make a skirt...I think they'll be cute together. If I'm right, I'll post a photo of the whole outfit once I finish it all.
Monday, June 8, 2009
Image heavy to make up for my blogging failure
I am a bad blogger! Not only did I skip posting this weekend -- that's excusable, because I was really tired -- yesterday, I forgot to take a picture of Saturday's progress before I started knitting again. *hangs head in shame* I know, I know. I was doing so well, too!
But! All is not lost. I remember where I was at when I stopped Saturday night, and I'll explain both with words and a diagram.
First things first. Friday (Day 9) progress:
I completed the left front. There seems to be an error in the pattern. The armhole shaping seems to be on the wrong side. Either that, or I'm crazy. But I made it work (by following the armhole shpaing instructions for the right side), so even if I'm crazy, I'm obviously not THAT crazy.
Also, it's only the left front to people looking at it. It goes on the right side of the body. But that's not a problem, because the other side (what they have marked as "Right Front") is the opposite, so it works out fine.
Also on Friday, I knitted the first of two sleeves. I decided I'd go ahead and get the small stuff out of the way. It didn't take long at all, being very tiny and lacy.
Day 9 progress:
On Day 10 (Saturday) I didn't get much done. I was busy all day long, and only managed to snag some knitting time while I was in a pavilion at a public lake listening to 50s and 60s music. (My dad, who runs a karaoke and dj business, had to do a "sock hop" at Diamond Lake Resort.) But the thing didn't start until 7 p.m., so I didn't get to knit for long before it got too dark to see what I was doing. I started the second sleeve but didn't get too far. I might've kept going if I was knitting stockinette, but not lacy sleeves with shaping. Therefore, I stopped after the ribbing and half of one repeat of the lace pattern.
See? My stopping point is marked here. (Lovely little Paint diagram...)
I showed Dad's friend Dave the finished sleeve. He looked at it, then held it up to himself (upside down) like a fig leaf. Yep.
And, as you can tell, yesterday (Day 11) I finished that sleeve off. I also started the right front and got through the ribbing before I got too tired to continue.
So, to review, I have now completed the back, both sleeves, the drawstring, the left front and a small portion of the right front, all of which are shown here in this not-very-good, blurry, angled, too-bright picture that I worked hard to get (had to pick up the laptop and hold it in just the right spot, at just the right angle, while pushing the button):
(Back with drawstring threaded through it, "left" front, both sleeves and "right" front in progress)
I tried editing the picture with Picnik. I'm not sure how much it helped. I don't have Photoshop working on this computer yet. I turned the sharpness way up so you could at least see the laciness a little bit. It still kinda looks like crap, though, at least on this computer. I promise, the sweater looks MUCH better than the picture of the sweater does.
What all of this means is that once I finish this right front I'm working on, which shouldn't take long, all I have left to knit are the button bands. Then blocking, sewing, weaving in ends and possibly another blocking to make sure it looks as good as possible and it'll be ready for wear. Oh, and the neckline ribbing. I keep forgetting about that. It's only 2 rows, though.
The end is in sight!
-Amie
Sunday, June 7, 2009
day 9
day 9: i finished the sweater half and found a slight error in the pattern. i also knit the first sleeve.
but no picture or details tonight, because i'm tired. i'll post those tomorrow along with day 10's progress.
-amie
but no picture or details tonight, because i'm tired. i'll post those tomorrow along with day 10's progress.
-amie
Friday, June 5, 2009
Day 8, and the knittin' is good
The sweater fronts are going pretty quickly. One more repeat of the lace pattern and I'll already be up to the armhole shaping. It's not too much of a stretch to imagine that I'll be able to finish the left front today. That'll just leave the right front, sleeves, button bands and finishing, which just involves sewing the 5 pieces (back, left front, right front and sleeves) together, weaving in ends and washing/blocking.
I'm still pretty happy with how it's turning out.
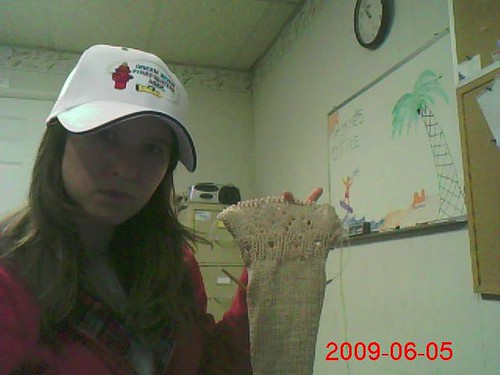
Added bonus: you get to see my lovely Green River Firefighters Association hat, which they gave me because they like me (it's mutual) and the tropical surf scene Jacqueline drew on my dry-erase board. You can't tell in this picture, because the knitting covered it up, but there's a shark in the lower left corner of that picture. And the surfer is saying, "Whoa." Like Joey Lawrence.
(By the way, I look annoyed in the picture. I wasn't. I was smiling the whole time, except, apparently, the minute I pushed the camera button.)
Thursday, June 4, 2009
Back in action
Since this is a slow work week, I had time to knit yesterday. After nearly killing or embarrassing myself to show the finished back (don't ask), I kept going. I decided I didn't want to start a new ball of yarn without finishing the old one, and I didn't want to join new yarn in the middle of a piece unless I had to, so I worked on the drawstring instead.
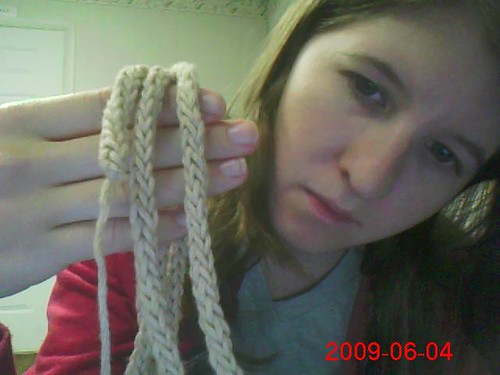
45 inches of 3-stitch i-cord:
I hate knitting i-cord. But at least it's done. I originally intended to knit 36", but then decided it was too short. And I had yarn left anyway, so I kept going. I thought maybe I'd knit to 48" but I ran out of yarn first. Oh well. 45" is good enough. And since this is 100% cotton, it's liable to stretch, anyway.
Then I started the left front. I got through the bottom ribbing and 32 (of 44) rows of the bottom stockinette. Just 12 more rows of stockinette, decreases, center ribbing (which will be the trickiest part yet, because I have to space the eyelets correctly and hopefully end up with the correct number in the end) and then the top lace pattern.
I got a little goofy/silly taking this picture. It reminded me of a veil. You know the ones.
Or a ninja scarf/bandana/handkerchief/thing. Either way.
I really do love this pattern so far. And I've barely made any mods at all, which is unheard of for me, as you know.
Wednesday, June 3, 2009
Day 6 for real
Since I didn't get to knit for several days, thanks to medical issues of various sorts, this is the real day 6 of Hey Teach. I'm not counting the days I didn't get to knit.
I finished the back!
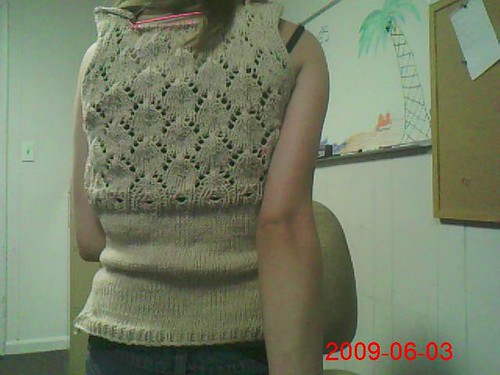
Ignore the fact that it's bunched up and is sticking out in weird places and just general sits awkwardly. That's only because of the extreme discomfort I experienced trying to take a picture that showed how it was fitting me. (It was paper-clipped to the straps of my tank top, which was then flipped around backward, choking me in the process, and I obviously turned my back to the webcam and reached behind me to click the button. Yes. Difficult.)
I'm pretty happy with how it's fitting. When I first finished the back and looked at it, I thought it was going to be way too long and there was no way the ribbing was going to fall at the right spot on my ribcage. But it had just gotten stretched out lengthwise during knitting. I tugged on the side edges to make it fit around me correctly and that corrected the length problem as well. Yay!
Oh, and the back took less than 2 balls of yarn. I probably have enough yarn left from the second ball for one sleeve or for the drawstring. And I still have 5 balls that I haven't touched yet. (Jess, how many did I give you? How much of this yarn did I have anyway?! I'd already used part of it, and I know I gave you some, and I still had 7 balls left!)
Now to start the front pieces. I'm estimating 6 days for both of those, since that's how long the back took, but obviously it depends on the amount of knitting time I have. Then the sleeves, the i-cord drawstring, the buttonbands and the finishing.
I can't wait to finish and wear it.
Subscribe to:
Posts (Atom)