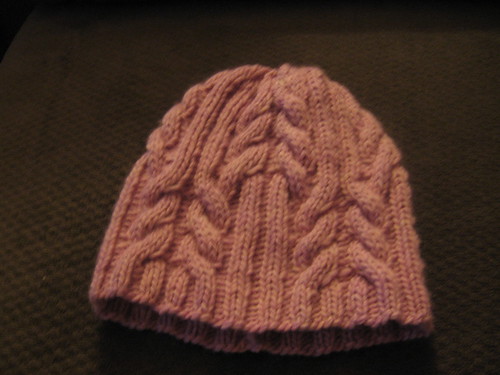
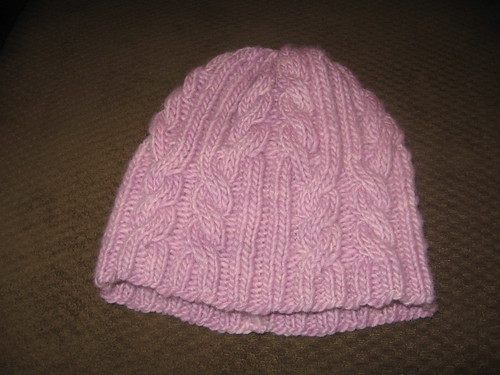
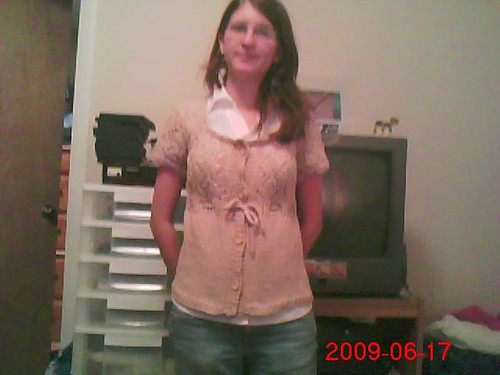
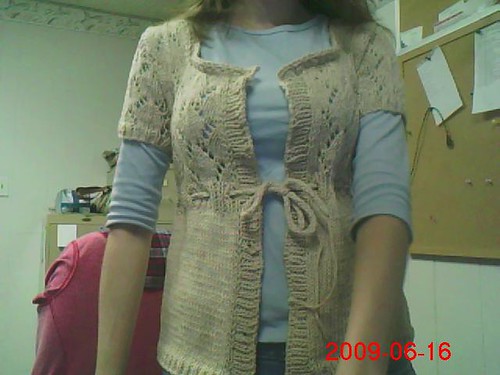
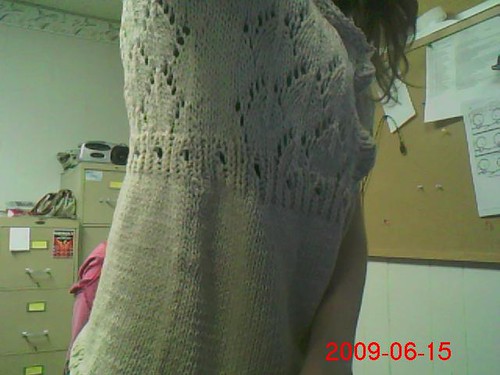
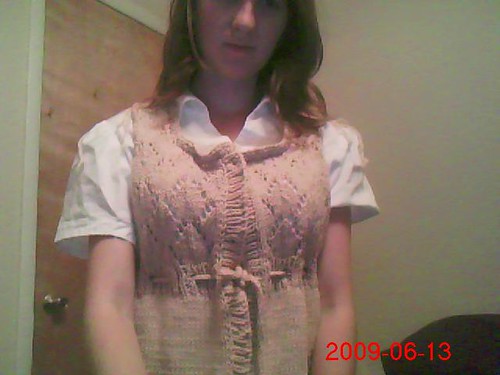
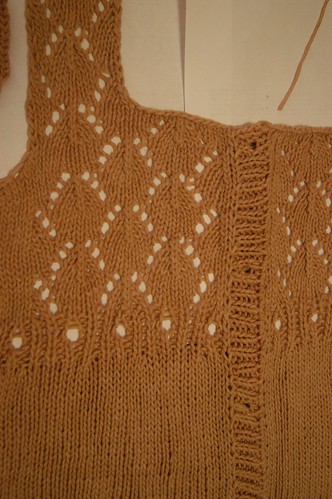
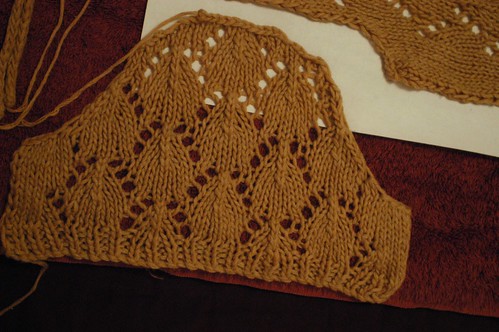
I finally found my Baroness Beret! It was crumpled in the pocket of my former favorite sweater (only former because Luke accidentally shrank it in the wash). I dragged the sweater out the other day when temps dropped, and lo and behold, there was my beloved hat.
So, since I know you've been waiting for months for these pictures (hah) I won't keep you in suspense any longer.
It turned into more of a slightly-loose beanie than a beret, but I think that suits me better anyway.
It's slightly crooked on my head here.
Top view of the hat on a jug of pretzels. Since the jug lid is white, you can't tell too much about the pattern, and the closure at the top looks a little strange because the hat isn't pulled across the lid evenly. But you can kinda see the star-shaped decrease pattern, which is what I was going for.
Yeah they're all webcam photos. I was excited when I found the hat and went for the closest camera. I'll make Luke get better pictures some time. Or I'll make an attempt with the camera timer, but that's harder to do outside and the light in our apartment is horrible. Anyway. I'll get better photos. And I'll try not to wait months this time.
In the meantime... I DID get the better photos of the printed silk progress, just like I promised.
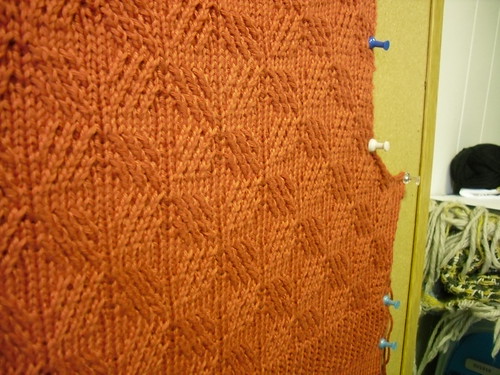
Side view; you can see that my left-leaning crosses are not nearly as neat as the right-leaning ones. This always happens to me. Maybe some day I'll figure out why and correct it, but I kinda doubt it, since I follow directions exactly. But they look a lot better after blocking anyway.
Close up. You can tell that the column of knits between the decreases gets a little stretched-out and makes very obvious vertical lines. I don't mind it terribly, but I'm hoping it becomes a little less obvious with blocking.
This one's blurry, but it really shows off the impact of the embossed diamonds pattern.
Again, not a terrific picture, but it shows how the embossed diamonds look almost like a check pattern at a different angle. It's funny. At one angle, they're the embossed diamonds like in the previous picture. At another angle, it looks checked, like this. And looking straight down at it from above, it looks like vertical ripples, like I mentioned yesterday. (The same thing happens when looking straight up from below, but the individual columns of stitches are more emphasized from below. I prefer the view from above. Mom's short anyway; it's not likely anybody'll be looking straight up at it.)
Another semi-close-up, pretty much just because I can. From this angle (maybe a 45 degree from below?) you can see the individual columns of stitches rippling up but the diamonds stand out more, at least to me. I love this shirt. It's almost like a Rorschach inkblot. What do YOU see?
If the color looks off on this one, that's because it is. Well, actually the color is off on all of them; this one is actually the closest to the real color. It was WAY off when I first uploaded it, though, and I did a quick correcting job on it. I wasn't concerned with making it perfect, just not gray. Aside from the color weirdness, it's a fairly good close-up of the bodice.
At least some of these are about to go up on Ravelry to replace yesterday's crappy webcam pictures.
Aaaaaaaaaand, while I'm here ... I never posted finished photos of Lelah, so here's a couple. (I intend to replace the yellow ribbon with white, but yellow was closer to me at the time. Also, the straps are convertible. Yay!)
Thursday, October 1, 2009
Wednesday, September 30, 2009
I'm back
I've been slacking on the blogging. Life gets in the way. But I have been knitting ... a little. I managed to get the back piece of the Printed Silk Cardigan finished. Now I have a little less than a month to knit both fronts, knit both sleeves, sew it all together, knit button bands and neckband, buy buttons, sew the buttons on and do a final wash and block. Easy, right? Hah.
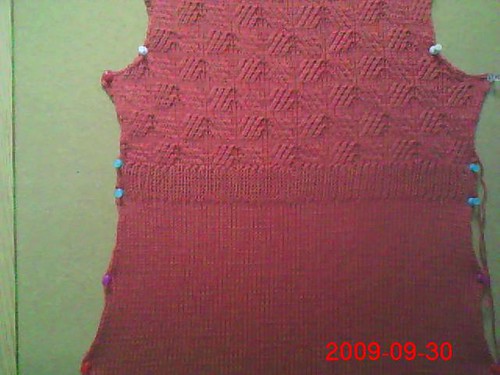
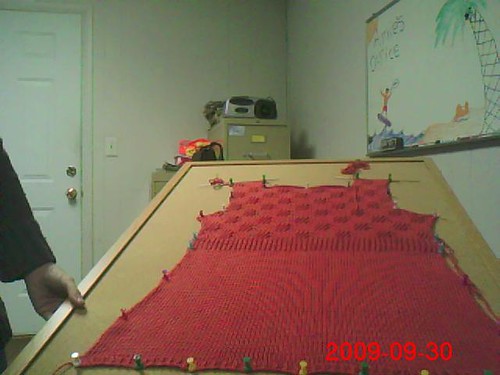
These aren't good shots of it, because I'm at work. I worked with what I had. What I had was a bulletin board, a ton of push pins and a built-in webcam on my laptop. At least this should give you an idea of how the stitch pattern looks, although in person it is slightly more subtle. And it gives more of a vertical ripply, ribbon effect.
This also has not been blocked. Dimensions are slightly off at this point, and the stitches aren't as even as I'd like. But I didn't want to do a full block until I had all the pieces done.
On to the pictures!
(I promise, that weird wavy thing at the bottom is from the camera. The shirt doesn't really look like that.)
Notice that Blogger clips the pictures along the right side. The whole thing can be viewed on my Flickr account or on Ravelry. There are a couple of other pictures up on Flickr, too, but they're not good at all and don't really show any of the detail. That's why they're not posted.
knitting complete
I added them up... there are at least 15 projects that I've either completed or that are close to completion right now. Not a single one of them are blogged about. Hmmm I keep thinking I'll remedy this. but in reality I probably wont. I'm just so bad at it.
I know at least 3 of the projects that are being worked on right now will eventually get blogged about. Most likely when they are complete. they are larger projects. I'm pretty good about blogging those. But all the socks and soakers and what not I've done. I'm not sure they'll show up on here. They are up on Ravelry. so really if you are antsing to keep up with my knitting go look there. I keep rav updated. although not always with pictures.
Just wanted to share that I am actually knitting. Just not blogging. I think I should teach Nathan how to blog for me. hehe. He loves taking pictures. He'd probably get a real kick out of it.
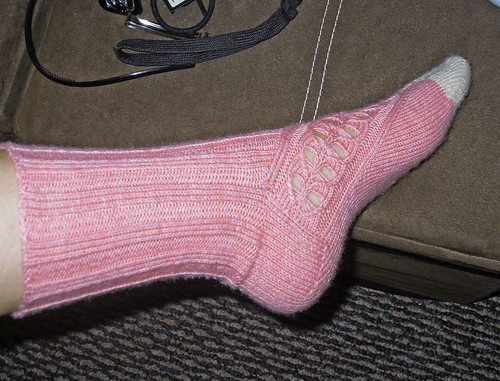
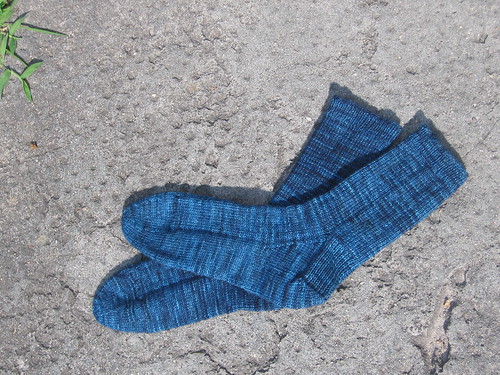
Amie's bday socks 2009
Since 2006 I've been making Amie socks for her birthday. This year was no exception.
Amie's Bday socks 2009
Pattern: Kai-Mei by Cookie A from "Sock Innovation"
Yarn: Lorna's Laces Shepard Sock in Peach, tiny bit of KnitPicks Gloss Bare
Needles: 2.0mm (us 0)
Start: August 20
Finish: August 27
notes: easy pattern. I used up ever last inch of peach and then did toes in white. The gloss is a bit thicker than the shepard sock, but I think they worked well together.
Monday, August 31, 2009
birthday!
i got awesome birthday socks today from the world's best sock-knitter! love 'em, jess. perfect fit, extremely well-made (as always) and very comfy. what pattern and yarn is this?
i tried to take pictures, but i had to use the flash and it washed them out. i'll have to wait till daylight.
and the socks even came with a card signed by my favorite 4-year-old boy (and 3 other pretty cool people).
thanks, jess!
i tried to take pictures, but i had to use the flash and it washed them out. i'll have to wait till daylight.
and the socks even came with a card signed by my favorite 4-year-old boy (and 3 other pretty cool people).
thanks, jess!
Thursday, August 27, 2009
Shrug
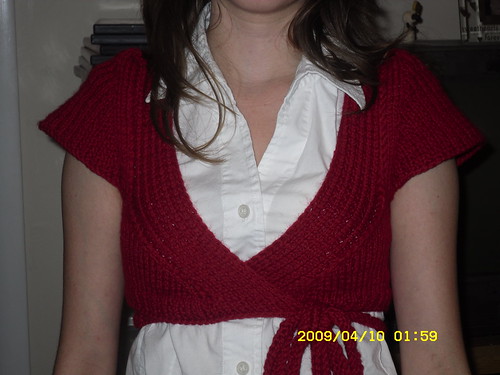
The shrug is finished. I may have already mentioned that, but I can't remember. Here's a picture, though.
Ignore the fact that the shrug does not match what I am wearing. I'd just gotten home from work and threw the shrug on for a quick picture before it got too dark.
Also ignore the general suckiness of the picture. I asked Luke to take it, and he didn't want to because he was watching a tv show. Which he had downloaded, so it's not like he was missing anything by going outside to take a picture. But he was pouty and impatient and didn't bother to wait for the camera to focus or any other silly unimportant things like that, so the picture's pretty crappy. But it shows the shrug, and that's the important thing, I guess.
Also, by the time I coaxed him outside to take the picture, the sun had gone behind the building and everything had a bluish tint. So the color is way off in the photo.
I'll have to get better pictures later to put on Ravelry. In the meantime ...
Friday, August 21, 2009
Back to work
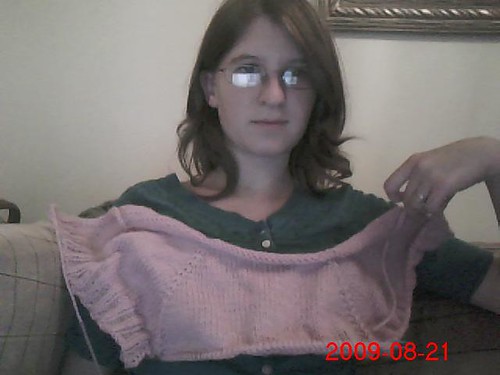
As of about 11 tonight, I am back to work on the shrug. Photos soon. I need to finish binding off the first sleeve, then I'll try it on and get photos. But I was afraid I'd forget to blog if I didn't do it now.
Update: photo. Trying it on didn't really work because it's still very much in a state of un-contruction. But here it is draped across my chest, even though it will not cover my chest (back and upper arms only) when finished.
Wednesday, August 19, 2009
Progress
I have made a little progress on the Printed Silk Cardigan. Other things have prevented me from working on it much, including an impromptu quick shrug project (more on that later), but I have worked on it a bit.
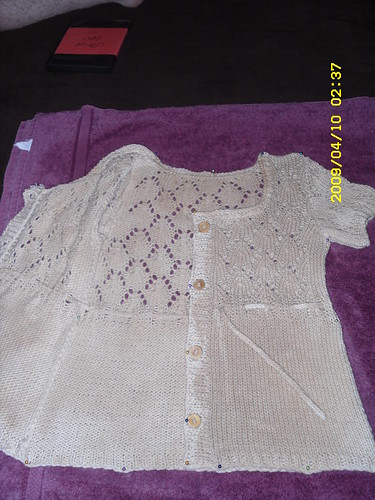
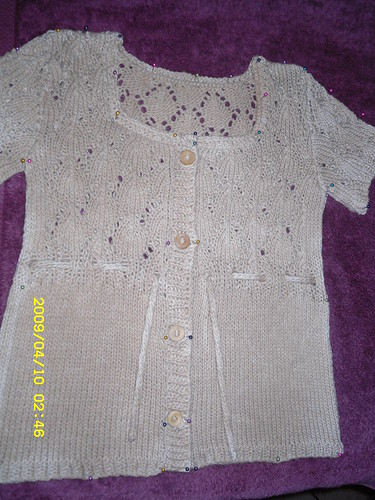
Wanna see pictures? You know you do... (Ignore the wrinkles, it was wadded up in my bag. Definitely will need blocking and maybe ironing when I'm done.)
Whole piece so far:
Stitch definition:
Artsy! (Looks long, doesn't it? It's only 16" right now and should be about 18" once washed.)
I should also note that those pictures have not been touched at all, as far as post-processing goes, so the colors may be slightly off. But they look pretty close on my screen.
(Photos and project notes are also available on Ravelry.)
At this point, I am a few rows past the first decrease row. I spent some time figuring out how many times and how often to decrease to get the fit right. I'm going to be doing a lot of math to make this sweater work. But Mom's worth it. And this much of the math is already done, and it'll be the same for the front, so ... looking on the bright side ... I'm nearly halfway finished with the math! Most of the measurements are in inches, not row counts. I should be okay.
Speaking of being halfway done. There are six inches of waist-shaping decreases in this sweater! But the good news with that is that once I finish the decreases, I'll be almost up to the center ribbing, which I'm supposed to begin once my finished piece reaches 10.25". I worked 3.75" before starting the decreases. Do the math. That only leaves .5" -- about 4 or 5 rows -- of stockinette between the last decrease and the center ribbing. And after the ribbing, I get to start the fun part. I say fun. I mean potentially complicated, as far as math goes. But at least it'll be interesting. I think.
So yeah, now I just have to plow through the 51 rows of waist shaping, and everything will be just peachy. I think I've worked 6 of those 51 rows so far.
Oh yeah, and my impromptu shrug project. Long story short, I have a dress that I really like but am uncomfortable wearing. I think I'll be more comfortable if I have something to wear over it. (Basically, the top is loose and flowy and not my normal style, and I think I'd prefer something more modest.) This is the dress I would like to wear to a friend's wedding at the end of the month. So, 3 days ago, I found a simple pattern, dug out some stashed yarn and started a shrug. Two days ago, I finished all the stockinette and started the ribbing on one sleeve. I was almost finished. But I left it in someone's car and can't get it back until tomorrow evening. I'll post pictures when I get it back. It may be finished before I get the chance to do so, but hey ... it was a quick project.
Last thing: remember, the Printed Silk Cardigan is a birthday gift for Mom, so please don't spill the beans!
Monday, August 10, 2009
It is begun! (Or, Lessons in Gauge.)
First things first: yes, I did finish the straps on Lelah in time to take it on vacation. They stretch a little more than intended and work much better when crossed in the back, but that's okay. I ended up not actually wearing it on vacation, but that's okay too. I just need to get a white ribbon to thread through the eyelets and I'll be pretty happy with it. I didn't bother blocking, but I don't think it really needs it.
Now, the more exciting news. I have started my next big project: a printed silk cardigan for Mom, as a birthday gift. It's a surprise, so shhhh. She knows I was thinking about knitting the sweater and even helped me pick out the yarn color, but she thinks I was looking at it for myself. She also doesn't know that I've started it or even bought the yarn yet.
I'm using Knitpicks Shine Sport in color Terra Cotta. Don't be fooled by the picture on the web site. The color name is accurate. It's actually rather dark, very much like real terra cotta. Maybe a little more orangey. But definitely not the pinky, salmon-y color that shows up on my screen on the online color card. Oh well. Mom'll still like this color, I think, and I think it'll look okay on her. Not as good as a salmony pink. But she does like orange, and this is sort of like a deep burnt orange color.
I love this yarn. This is the second time I've used it, and I still can't get over how nice and smooth and silky it is. Definitely the best cotton I've used, by far. But I am having a slight problem with it. I can't get gauge. I'm apparently not the only one, either. A lot of people on Ravelry made this sweater with Shine Sport and had trouble with gauge. But it's kind of ridiculous. The recommended yarn, Fiesta La Luz, is quite a bit lighter than the Shine Sport, in terms of yards per ounce, but it appears to be a slightly heavier yarn weight. (That sentence would not make any sense to non-knitters, I know.) La Luz is DK, as opposed to the Shine's sport weight, and the gauge is 23 sts/4" on 6s whereas Shine is 24 sts/4" on 3s-5s. So you would think they'd be close enough to make it work. You would be wrong.
This is where the lessons in gauge part comes in. The gauge called for in the pattern is 25 sts/4". I swatched on 5s. WAY too big. 25 stitches was more like 5 or 6 inches. I swatched on 3s. Very close. Until I washed the swatches and they grew. My 4-inch swatch became a 4.5-inch swatch. Non-knitters, I know, that doesn't seem like a big difference, but do a little math. The pattern calls for 6.25 stitches per inch. The smallest size, which is the size I need to make, asks me to cast on 113 stitches, for a finished piece (the back of the sweater, in case you were wondering) of just over 18". So then do the math for my knitting on 3s. 25 sts/4.5" is about 5.5 sts per inch. Again, it doesn't seem like a significant difference from the pattern's recommended gauge, until you figure out how much of a change that'll mean over the whole sweater. If I followed the pattern as written and cast on 113 stitches, my finished back piece would be 20.5". 2.5" too big. And the front would be that much bigger, too, for a total difference of 5".
That won't work. I don't want to give Mom a sweater that is 5" too big for her. That IS a significant difference.
(Okay, my actual gauge was more like 5.25 sts/in. I couldn't remember exactly how big my swatch was after washing, so I just guessed. The basic principles are the same.)
So it looks like I'm going to be doing lots of math. I figured out how many stitches I'd need for the correct measurement, figured out the stitch count for the repeat (repeat of 16 stitches + 1 + 2 for edge stitches) and ended up casting on 99 stitches. I'm crossing my fingers and hoping it fits. Most of the lengths are measured in inches, rather than row counts, so I shouldn't have a huge problem there. I'll just have to do some fiddling with the increases and decreases. And I'm hoping that changing the stitch count doesn't mess up the embossed diamonds pattern. The alternate sizes change the stitch count by 12 and 14 stitches, not a whole repeat, so it's a little confusing.
Oh, and did I mention that I'm using 3s (rather than the pattern's recommended 5s) to get this gauge? That's why I don't want to drop any more needle sizes. I have a feeling I'd have to go down to 1s or even smaller to meet gauge. I really do NOT want to knit an entire sweater in two months' time on needles that small. It'd be like knitting plate armor, anyway. The drape is already a little stiffer than I'd like. 5s were too loose, though, and rather than trying to find 4s I like and cast on even fewer stitches, I'll deal with the slight stiffness. I'm sure it'll work out just fine.
It is looking rather nice. I've already made one small modification, in addition to changing the stitch count. The pattern doesn't have any sort of border along the bottom edge. It's just pure stockinette from the bottom cast-on to the waist ribbing. Rather than combat the curling, I worked 3 rows of 1x1 rib at the bottom. It'll match the waist and neckline ribbing, and it should keep the bottom from curling upwards. I think 2 rows would've looked better, but I was afraid it wouldn't be enough to combat the curl and would just flip upward. So 3 rows it is.
Pictures to come later! I know, I wrote out this long post and now I'm not posting pictures. But I don't have the real camera handy and I want to show off how nice the yarn looks. So just pretend I've included pictures. (P.S. I'm 10 rows in on the back piece.)
Oh, and for my own personal reference ... I cast on yesterday, Aug. 9, 2009. My goal is to have the sweater completed before Mom's birthday on Oct. 27.
Wish me luck.
-Amie
Wednesday, July 29, 2009
Progress on Lelah
I haven't posted anything in several days, but I have managed to get a little knitting done. It's almost finished!
My goal is to have it ready-for-wear by vacation. (We leave next Monday, Aug. 3.)
ignore the bra straps! they will be replaced with (convertible) spaghetti straps. and a white ribbon will be threaded through the eyelets just under the bust.
(to explain: by convertible, i mean that the spaghetti straps, which will be i-cords, will have hooks attached to the ends, and there will be a series of eyes sewn to the inside of the top hem of the shirt so the straps can be moved or removed.)
Wednesday, July 22, 2009
Meh.
Again, no pictures. I have been knitting a little here and there. I finished the lace portion of Lelah and I'm almost halfway through the stockinette. I added bust dart-style increases from bottom to center so it'll fit just right (without adding elastic to the top, since I'm adding straps) and I plan to do decreases along the side "seams" (so they'll be hidden) from center to top to compensate for those extra stitches. I'm pretty happy with how it's turning out so far, although it is still just a little sheer and may still have to be lined.
The only problem is that this week is completely crazy (fair week) and I don't have time either to knit or to take pictures of my knitting. Maybe after July is over.
I also didn't have time to register my projects for the county fair, like I'd planned to do. :( Sad.
The only problem is that this week is completely crazy (fair week) and I don't have time either to knit or to take pictures of my knitting. Maybe after July is over.
I also didn't have time to register my projects for the county fair, like I'd planned to do. :( Sad.
Thursday, July 9, 2009
Finally, the good FO pics!
Yes, I'm still here. I haven't posted lately because I haven't been doing much knitting. Well, okay, that's not really true. I'm knitting. But I'm working on super-secret surprise gifts that I can't post here for fear that the recipient will see them.
I've worked on Lelah a little, too, but I haven't made much progress on it. I'm about halfway through the 9th repeat of the lace pattern. The new plan is to work 11 repeats of the lace then start the stockinette. I'll switch to smaller needles for the stockinette portion so it's more solid and not see-through. Much smaller needles -- I'm thinking 4s or 5s for stockinette, and I'm using 10s or 10.5s for the lace. I'm hoping to be able to wear the top by itself, without a bottom layer or a lining, without flashing my bra to the world.
More interesting: I finally got around to having someone take good, high-quality photos of Hey, Teach! They show off the whole top, the way it fits, the stitch detail, etc. The pictures also show how the buttonband still gaps a little; I'll eventually work a narrow, tight crochet row (probably one row of single crochet, worked with a small hook) to draw it in a little and hopefully make the buttonband less floppy. I'll probably also work a row around the sleeves at the same time so they fit a little more snugly and are a bit puffier. I just haven't done any of that yet. I can (and do) wear the shirt as-is. I need to do all that soon, though, because I plan on entering Hey, Teach in the county fair!
Ignore the bumpiness on the bottom section of the shirt-- it's just wrinkled from where I've been sitting at the desk all day. This fabric wrinkles like nobody's business. But that's okay, I still love the top.
Photos courtesy of Jacqueline Jordan. (Yes, she's my editor. She has a photography business on the side. Check it out!)
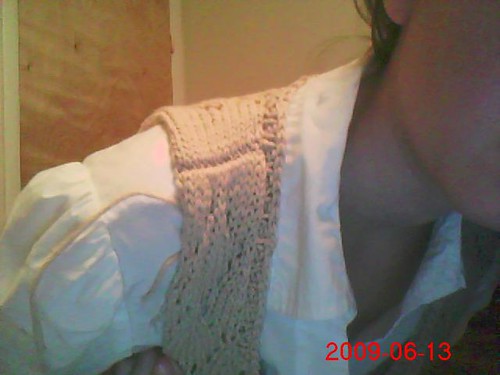
Hey Teach! Complete!
Back view (Wooo wrinkles!):
Thank God the shirt's made out of 100% cotton, hehe. I can remove the wrinkles fairly easily without having to worry about damaging the fabric.
Stitch and button detail:
If you look in the lower left corner, you will see that I had a bit of a rowing-out problem with the stockinette, as is normal for me. Blocking took care of most of it and you can't really tell when it's being worn. Even I have to lift the hem of the shirt and look at it at an angle to see the slight bumpiness/ridginess.
And a side view that makes me look completely shapeless. It's just because the top was flaring a little over my stomach and at the buttonbands, and I didn't realize it. I'd have smoothed it out if I'd noticed. It doesn't really matter; this picture shows the shape of the top, and the sleeve, quite nicely, I think.
And no, I'm not really headless. I told her to focus on the top, to get as much detail as possible, and to feel free to cut my head out of the pictures because, as you know, I hate pictures of myself. :) And also, my face looks weird today. (A combination of being tired, drinking a Mt. Dew Game Fuel that turns my lips blue and just a bad appearance day. Yesterday was a good appearance day. Can't expect two in a row!)
Tuesday, June 30, 2009
Another new project
I started a Lelah (no link, because it's a pain in the butt to find the pattern now, I'm mostly going off memory) to alternate with Luke's hat. Turns out Patons Kroy isn't much fun to work with. It's a little scratchy. I've barely gotten past on the ribbing on the hat and I needed a break already.
I can't remember exactly which yarn I'm using for Lelah. It's a bamboo/acrylic blend from Hobby Lobby. It's mostly acrylic, if I remember right, bu I decided this wasn't the sort of project that would need a hard block. And I love the silky, slinky drape of it. It's very nice. And blocking will help even out the work, it just won't open up the lace any more. Which is fine. I kinda like it the way it is.
Here's progress so far:
Color is fairly accurate, maybe skewed just slightly to the blue side. It's a pale turquoise-y color. I like it a lot.
I'm working on the 6th repeat of the fishtail lace. The pattern calls for 7-8, but I'm using smaller yarn (light DK) so I think it's going to be more like 12 or 13 repeats for me. That's fine, as long as I don't run out of yarn. I only bought 2 balls. I've still got quite a bit of the first ball left, though, and haven't broken into the second yet, so I think I'll be okay.
I'm using my Addi Turbos (size 10, or maybe 10.5, I don't remember for sure) for the lace pattern, but I'll have to go way down for the top stockinette portion. I'll probably use 4s or 5s for that. Maybe even 3s. I want it to be as solid as possible.
I also plan to put straps, but I can't decide whether I want to do regular tank-top style straps with a square neckline, gathered straps to create a slightly more interesting neckline shape or simple i-cords. I guess I'll decide when I get there. It may depend partly on the amount of yarn left.
I'm thinking either matching i-cord or white ribbon for the tie.
Maybe I'll eventually find and post the link here. In the meantime, you can find Lelah on Ravelry. (Yes, I know, I could link that, but then I'd have to go find it, and well...yeah.) There's nice fo on there with tank-style straps, though.
ETA: Okay I grabbed the second ball of yarn when I went home for lunch. It's Naturally Caron Spa, 75% "microdenier" acrylic and 25% rayon from bamboo, in the Ocean Spray colorway. The color on that site is pretty accurate on my monitor.
And, okay, fine. Lelah. Or, on Ravelry, I like this one.
Saturday, June 27, 2009
Productive day
I found a new yarn store yesterday. We went to The Village Knitter in Newburgh, IN. I love it! They had a pretty good selection of yarn. There were a few notable things they didn't have, like Lamb's Pride, but I can't think of anything notable they don't have that I like, anyway. Nice selection of the stuff I do like, and it's organized by yarn weight, which is kinda nice. Prices are comparable to any other yarn store I've ever been in. And most importantly, the women there were unbelievably nice. I was wearing my Anne Elliot, and they all oohed and ahhed over it. :) I was around the corner from where they were sitting, and I heard one of them make a comment about how the shirt I was wearing was really cute. They discussed it for a minute, debating whether it was handknit or not, and then when I stepped back out into the open they called me over and praised it. It made me happy.
I didn't buy any yarn, but I did pick up some Crystal Palace needles. Size 5, 16" circs. Yay for new hat needles! My old ones had disappeared.
Plus, the store itself is really kinda cool. It's in downtown Newburgh, a block from the Ohio River, in the middle of the antique district. The buildings are all old and cool-looking, and it's a nice little downtown area to walk through. Reminds me a little bit of a much less busy, much smaller Gatlinburg or maybe Pigeon Forge ... lots of little stores to visit, and it's the perfect area to walk through, instead of driving.
I still like Enchanted Yarn and Fiber, too. We just don't get down to Russellville very often. We're in Owensboro all the time, and Newburgh isn't that much farther. We also visit Evansville fairly regularly, and Newburgh is on the way (assuming we take that route). And I like Special Things, too, but it's nice to have a couple of different options.
Pretty happy with my discovery. Luke liked the area too. He didn't care that much about the yarn store itself, not being a knitter, but he liked the area.
In non-knitting news ... Luke and I also stopped by the drive-in on our way home yesterday. That was fun. $8 per person for two new movies, not terrible quality, and it was a nice experience. Plus, I could knit while watching the movie and not offend or annoy anybody, since we were alone in our car.
It was a good day.
Oh, almost forgot to mention, the ladies at The Village Knitter definitely know what they're doing. They had several very nice samples there, including what appeared to be a mohair-blend (I'm thinking maybe Kidsilk Haze) Estonian Lace Garden. That was exciting. I still like mine better, of course. But it made me happy to see the shawl, point it out to Luke and have him recognize it as something similar to my shawl. And it was very well-done. The slightly fuzzy yarn did well with that pattern. Good to know...all the other samples I'd seen were done with smooth yarns with little to no halo.
Wednesday, June 24, 2009
hey jess...
I'm not sure if you've seen these or not, but the first reminds me of you and the second reminds me of Justin (obviously). Thought you might be interested.
Sparkle Flake dishcloth
Hero dishcloth
Sparkle Flake dishcloth
Hero dishcloth
Tuesday, June 23, 2009
another Jessica FO parade
Because I haven't posted since April but I have been knitting I have several projects to share. This is going to be a bit longer of a post. But hopefully I'll get back into the habit of posting fo's as a finish them instead of months later. We can hope anyways right.
First a test/sample knit for Lorna's Laces. This one was knit towards the end of last year. And apparently I wasn't bothered enough to list the actual start and stop times.
Pattern:Candy Dots Cardigan by Jackie Young
Yarn: Lorna's Laces Green Line Worsted in Mirth, Whisper, and Bittersweet
Needles: US 6 and 8 (4.0mm and 5.0mm)
Notes: a cute childs cardigan. I knit it late in the year, early in my pregnancy. I was exhausted most of the time so the actual knitting tool longer than it should have for me. Its knit flat and sewn together. not my favorite construction but its a nice shape. I knit the 6 month size. The yarn was a pure dream to work with. I'd use it again in a heartbeat. Lovely drape. Awesome color availability. Really a very nice yarn to work with. since it was a sample/test knit I no longer have the sweater and can't attest for the longevity of the yarn.
Next up we have Justin's 7th pair of socks. Another basic k3p1 rib sock with a slip stitch heel flap and gusset, round toe. These are knit from Smooshy in Black Parade. Which is a black yarn with just enough blue in it to not drive me completely crazy. I wasn't as impressed with the smooshy this go. I knit with it before and loved it. This time it just didn't seem as nice. The finished product is great. But it was a little stringier to knit with. perhaps I got an off skein. Justin loves them and wears them to often (meaning they are making regular appearances in his work boots and showing some felting on the heel as a result).
Pattern: Justin's basic sock recipe
Yarn: Dream in Color Smooshy in Black Parade
Needles: us 0 (2.0mm)
Start:April 7th
Finish:May 20th
I decided that I needed a fast project just for me. So I knit up a malabrigo hat. Last year when I made justin 2 hats, his dad a hat and his cousin a hat all from malabrigo, i'd also purchased some for me. But had neglected to knit it yet. Easy fast hat pattern.
First pictures shows the detail on the hat a little better and second picture is a little more color accurate.
Pattern: Utopia Hat by SmarieK
yarn: Malabrigo worsted
needles: 4.0mm (us 6)
Started: June 7
finished: June 7
I decided to surprise Justin for Fathers day with his 8th pair of socks. Again his basic k3p1 recipe. But I got an awesome yarn. JulieSpins MCN 355 (80% merino 10% cashmere 10% nylon) in Bright Space. This is by far one of the nicest yarns I've ever worked with. It is a bit thicker than some other fingering weight yarns. When Justin pickd up the socks the thickness was the first thing he noted.
Pattern: Justin's basic sock recipe
Yarn: MCN 355 (Rav link)
Needles: 2.25mm (us 1)
Started: June 8
finished: June 20 (just in time)
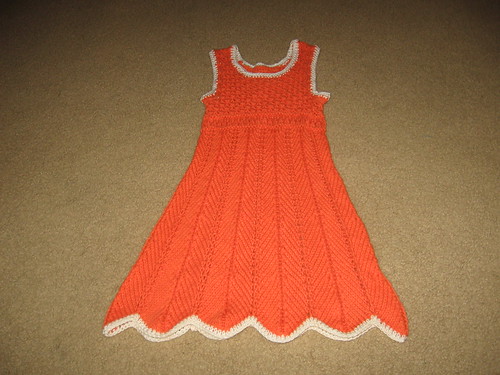
And since the father's day socks were a surprise project I had to find something to knit on while Justin was home (which was more often than I realized). So I knit Natalie an Elenka. Which went extremely fast. I have been promised a picture of Natalie wearing the dress. So hopefully will be able to share that with you. She tried it on for me and I was very happy with its fit.
Pattern: Elenka
Yarn: cotton-ease in orangeaid
Needles: us 7 (4.5mm)
started: June 11
finished: June 17
See told you I've been knitting. I actually even have 3 more projects finished and 1 in the works. But I'll save those for another post. This one is long enough already. Oh also all projects are documented in Ravelry, so if you by chance want more info on anything you can check it out there or feel free to leave a comment.
I'm still here!
Not much knitting going on around our house lately. Why, you ask? Well, two reasons. One, I've been trying to get the place cleaned up (a necessary evil). Two, I took my knitting bag on a weekend trip with me and now I can't find it. I'm almost 100% positive it made it back into the car when we left, but I don't remember seeing it after that point and I can't find it anywhere in the house. :(
I'm not too concerned about the knitting itself, because I hadn't gotten that far and it's an easy project. I haven't posted about it yet here, but as you see on the sidebar, I have started a new project: a gamer hat for Luke. It's just a plain gray hat, except it has Nintendo-related symbols around the edge. Specifically a triforce (from Legend of Zelda), a screw attack (Metroid), an energy tank (Megaman) and a P-wing (Mario). I'll post my charts here if they turn out well in the knitted product. But it may be a while before that happens, because first I have to find my knitting bag (with all the yarn and needles, which I am worried about) and then finish the knitting. I'm duplicate-stitching the designs on after the main hat is finished. I originally planned to knit them in, but it's more trouble than it's worth. Duplicate stitch will work just fine.
The basics: Patons Kroy sock yarn in a dark gray color, size 3 dpns and embroidery floss for the symbols because it's cheap and comes in a lot of bright colors and is about the right size if I use all 6 strands together. I couldn't think of anything better to use. No other yarn I saw had all the right colors, and you can't beat the price for embroidery floss, especially when you have to buy several different colors.
So, I'll post images and a chart whenever I can.
Meanwhile, Hey, Teach finished blocking and I wore it. I love it and got several compliments on it. The button band still gaps; I think it's just too floppy. I'll probably eventually crochet a narrow edge on it to help it keep its shape. The sweater also wrinkles like you wouldn't believe. I'm really happy with the finished product, though, and I'll post good-quality pictures of it begin worn as soon as the weather (and Luke) cooperate.
Friday, June 19, 2009
Block it ... block it good! (AKA Day 20)
I dug up some motivation, and some pins, and began the blocking process on Hey, Teach. I didn't do a full wet block this time, just spritzed with warm water mixed with a little tea tree oil. (I already had the oil in the bottle, and I figured its antibacterial properties wouldn't hurt anything. I just hope the oil doesn't do anything weird like discolor the yarn. Surely it won't; there are wool washes with tea tree oil in them.)
I used quite a few pins, though, to make sure everything was as even as possible, and I think it worked out to my benefit. The ribbing is all laying flat, and I stretched it wider to take out the flare. It worked. As long as it holds its shape when dry, things will be good, and I won't even need to crochet a border anywhere. Here's hoping.
And here's a few pictures of the blocking process:
The color is off, obviously, but it actually doesn't look too bad on the actual sweater. It's a little washed out but not horribly different. The towel it's laying on is actually burgundy, not purple, though.
The more I work on Hey, Teach, the more I like it. I'm hoping it'll dry quickly, especially since I just spritzed instead of soaking it in water, so I can wear it.
Luke is impressed by the whole thing, but especially by the i-cord, hehe. He looked at it earlier and asked me if I made "this rope thing" too. Then I had to explain how I made it. He picked it up and fondled it awhile, admiring it.
I'm glad somebody likes my i-cord, at least, because I'm not a fan. It looks fine, but not good enough to get me past the tedium of knitting it, hehe.
And, as an added bonus, I was finally able to get some pictures of Hew since I had the camera out anyway. Unfortunately, none of them turned out well. This is the best we got:
I'm planning on crocheting a row or two around the edges of the sleeves to tighten them up. Ribbing would work better, I think, but I'm pretty sure I don't have enough yarn left for enough ribbing to do the trick. But I don't like the sleeves being all loose like that. Oh, and they look lumpy in the picture, but I promise my arm isn't lumpy. I had the white shirt's sleeves wadded up inside Hew's sleeves. Definitely gonna have to hem the sleeves on the white shirt.
I was gonna get pictures of the Baroness Beret tonight, too, but it's gone missing. I'm sure it'll turn up, and I'll get pictures when it does.
Here's a link to the original post about Hew, but for your convenience, I used almost 4 full balls of Elsebeth Lavold's Classic AL in color 05 (Aged Wine) with size 4 needles.
All in all, I'm satisfied with Hew, but not thrilled with it. (Anne Elliot Spencer is much better.) But I LOVE Hey, Teach.
Wednesday, June 17, 2009
Finishing up
Well, what more can I say? Day 19, and ... It's finished.
I have yet to block it; I admit that I'm kinda putting that off because it takes so long to dry. (Especially since the air around here has been really damp lately.) And I think I may need to pin the ribbed edges, which means I have to find pins.
My goal is to be completely finished in 3 weeks (21 days of actually working on it). I think that should be pretty easy. 1 day to block, drying time doesn't count because I won't be actively doing anything to it, and then 1 day for crocheting along the edges (if necessary) once it's dry.
But aside from that ... voila!
If you look closely at the picture of the back, you can kinda tell where I had to be creative to get the eyelets threaded correctly, right in the center. It wasn't a mistake, exactly; I did the math and couldn't get things to work out how I wanted, so I opted for the least annoying solution. There's actually an extra eyelet there in the center, and the i-cord is just threaded through the stitches on either side of it. I guess it would've looked better to leave that eyelet out entirely, but it would've made it more difficult to find the right stitch and I didn't think of the obvious solution (a stitch marker) at the time. It doesn't look bad, anyway. I doubt anybody'll notice if I don't point it out to them.
I'm so pleased with this sweater. The ribbed bind-off edges (on the buttonbands and the neckline) are still flaring quite a bit, and I'm thinking that if blocking doesn't do the trick, I'll crochet a tight border on to pull it in and keep things in check. I don't know yet though. I'm really not terribly fond of the neckline ribbing anyway, so I may just cut it off and replace it with a crochet border. That would be narrower and I think it would look better. But we'll see.
Overall, I'd call it a successful project. Now I just have to work up the motivation for the final blocking so I can wear it.
For reference purposes ... another link to the pattern so you can compare mine to the original. Yes I used the entire outfit for inspiration. (I just didn't feel like changing into khakis for webcam pictures.)
It tooks cute over other shirts too, but I really love it over that white button-up. I had to tuck the white shirt's sleeves up about a half inch, since they're slightly longer than the Hey, Teach sleeves, but I think I'll end up hemming them anyway.
And I still have to take better pictures, with a real camera, once the final blocking is complete. In the meantime, you'll just have to deal with these, though. It was late last night when I finished it and Luke and I both worked today.
Oh, and you can blame Luke for the suckiness of these pictures. He was the one pushing the button, since I had to stand too far away to get the whole sweater in the shot.
-Amie
Tuesday, June 16, 2009
the end is near! (or, day 18 of the hey, teach project)
Hey, Teach is so close to being finished that we can just call it an FO, right? Right? Okay, well, no, not quite, but very very soon. I finished the second side seam last night. All the ends are woven in. (Except for the two on the i-cord, because I forgot about them, but I'll take care of those as soon as I post this.) The buttons have been purchased, and the needle is threaded to sew them on as soon as I find the bag they're in. Then I'll wash it and pin it to my block board and leave it to dry. (I thought about blocking it last night and sewing the buttons on later, but it was late and I was tired and didn't feel like spending forever hunting down pins and then arranging this sweater juuuuuuuuuuuuuust right to pin it down. You understand.)
Also, I don't think I'll need to redo the bind-off on the neckline. It still flares a little, but it looks much better when it's being worn. I think blocking will take care of it. I may be wrong, but I think it'll be okay.
So anyway...wanna see?
It gaps a little right now, but that's just because I used paperclips to hold it closed for the picture. This is what it looks like without the clips:
And yeah, I know, I'm wearing a shirt with longer sleeves than the sweater, but it was clean and comfy and I really like this shirt. Deal with it. ;)
So for the important part: Hey, Teach fits like a dream. And I am VERY happy with it. That makes 3 wearable projects that I am entirely happy with! (Anne Elliot Spencer, Baroness Beret and now Hey, Teach.)
Yay!
Monday, June 15, 2009
Hey Teach, Day 17
I got the second sleeve sewn in, and I managed to get one side seam sewn. I even wove in all the ends! All that's left now is to sew the other side seam, weave in those two yarn ends, sew on the buttons, thread the drawstring through the eyelets and do one final wash/block. I should be able to get that all done tonight, I think, if my meeting doesn't last too terribly long. Then I'll just be waiting for it to dry so I can wear it. Maybe if I leave the blocking board in my car, it'll dry faster. Hmm...
Sleeves:
Seam:
It looks a little loose because the other side is just hanging there, completely open, and because I'm wearing a thin tee shirt underneath. I think it'll fit pretty well with a nice button-up shirt.
It's good to know that at least one thing is working out the way I want it to right now.
Sunday, June 14, 2009
almost finished
Day 15 of Hey, Teach: I didn't get as much done as I'd hoped because I ended up sick and took a 5-hour nap (!) in the evening. I did manage to get the shoulder seams sewn and the neckline ribbing finished. I may have to pick out the bind off and redo it; I used a loose bind off and it flares a little. I'll just have to wait and see how it looks after blocking. It may be okay.
Ignore the too-large sleeves that I have yet to alter on that shirt. I haven't figured out yet exactly how to go about minimizing the sleeves and nothing else. Also, pretend that Hey Teach has sleeves and the sides are sewn together and there's buttons sewn on.
And a close-up of the neckline ribbing and the shoulder seam:
That ribbing is a little bigger than I expected, but oh well. I don't mind it enough to rip it out and bind off a row sooner. Although I might do that if I have to redo the bind-off anyway ... maybe. We'll see.
And, because I'm tired and I'm fairly certain I won't be doing anything else tonight, I'll go ahead and post progress for today, Day 16. No picture because I don't have the sweater handy and don't feel like getting up to get it, but all I accomplished today was the sewing-in of one sleeve. It took a little longer than I'd expected because I had to ease it in very carefully and I had trouble finding a sewing method I liked. I finally dug up a size E crochet hook and slip-stitched it in. I'm satisfied with how that turned out.
I'm hoping to get the other sleeve sewn in tomorrow, and maybe the side seams as well if I can find my tapestry needle. And I bought buttons the other day, so I need to sew those on. Then weaving in all the ends (except the neckline ribbing, in case I have to redo the bind-off) and the final wash and block. I'll get there, soon. It would be even sooner if I didn't feel like crap.
Oh, and for the record, I still have one full ball of yarn and most of another left over, with nothing left but sewing that one sleeve, the side seams and the buttons.
Thursday, June 11, 2009
Two weeks!
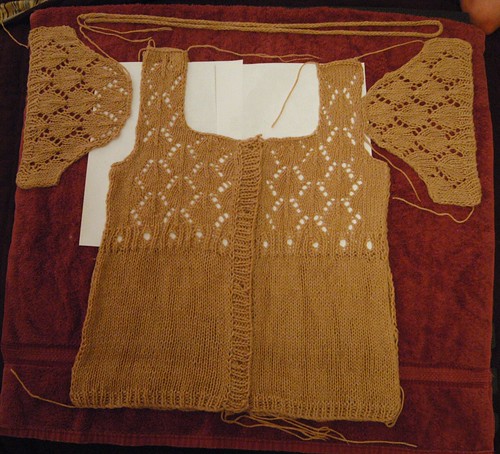
Well, I passed the Day 14 benchmark, and while I didn't manage to get the sweater completely finished in two weeks ... I did get it all the way to the first blocking stage. Yesterday I finished the buttonbands, which marked the last of the big pieces of knitting. Last night I blocked. Nothing major, since this blocking was only for sewing purposes and I'll do a real wash and block after the whole thing is complete to help settle the seams. I just soaked all the pieces in a sink of warm water and fabric softener and patted them out in the correct size and shape on some towels. No pinning or anything. The pieces stretched a LOT when they were wet, especially the back pieces, but I think I managed to get it back to the proper size when I smoothed it out on the towels. I hope. If not, I'll try to take care of it when I do the final block.
And let me tell you ... this yarn? So impressed with it. It blocked like a dream. I mean, seriously, all I did was get it wet and softened and laid it out flat. And it looks great. The stitch definition is perfect, everything looks nice and even, the lace is nicely-defined, and all without the use of pins or anything. I can definitely recommend it.
Without further ado ... more pictures (from a real camera!) than you really need of the blocking-in-process:
All the pieces laid out to block:
Close-up of the front, showing the lace:
I thought this was kind of a cool picture, and it shows the stitch definition well:
And, one sleeve:
I was good. I kept it to 4 pictures. (I have several more ...)
I know the buttonbands still look weird. I didn't mess much with them. I'll take care of those with the final wash and block. This time I was mainly concerned with the arms and shoulders. And yeah, these were taken inside at night so the color's a little bit off and I can't correct it very well without Photoshop. But it shows the stitch definition and all that. :)
And just because I can, here's a gratuitous picture of my cat.
Crappy picture, but I was trying to get ready for work and Luke was still asleep, so the lights were all off except that one lamp. I thought she looked cute there on my pillow.
I wanted to make sure the fronts matched up to the back, so I layered them. It'll take longer to dry, but everything will be the same size, and that's worth it.
I slipped some white paper between the layers to help keep the moisture where it belongs (and help it evaporate) and to help show off the lace in the pictures.
The pieces are on my blocking board in the living room floor now, still drying. That's the worst thing about cotton, it takes forever to dry naturally. Maybe I'll take a hair dryer to it at lunch or when I get home tonight. I'm anxious to get back to work!
Next step? Shoulder seams and neckline ribbing. Once that's done, all of the actual knitting will be done and there will be nothing left except for sewing the sleeve and side seams, sewing on buttons, weaving in ends and that final wash 'n' block. All of which I could theoretically finish today, if the pieces would dry and if I had buttons.
DRY! DRY! DRY!
Subscribe to:
Posts (Atom)